


If you are a software developer, then it is highly unlikely of you to not have come across the terminal program. You must have used it once in a while in the course of your work. These terminal programs are shipped with almost all the operating systems.
Terminal is the program where in your write and issue your commands, and they are executed using the underlying processing engine or shell. Depending upon the operating system you use, you will get a different terminal shell. For example, Linux operating systems will provide bash or zsh based terminal programs. Macintosh is unix based operating system and its terminal program is also bash or zsh based. Microsoft Windows provide DOS based terminal program.
In this article I am going to discuss about a package manager, called Homebrew, for your Mac terminal.
What is Homebrew
Homebrew is a package manager for your Mac terminal. Using Homebrew you can install tools and application packages available in the Homebrew library for your computer.
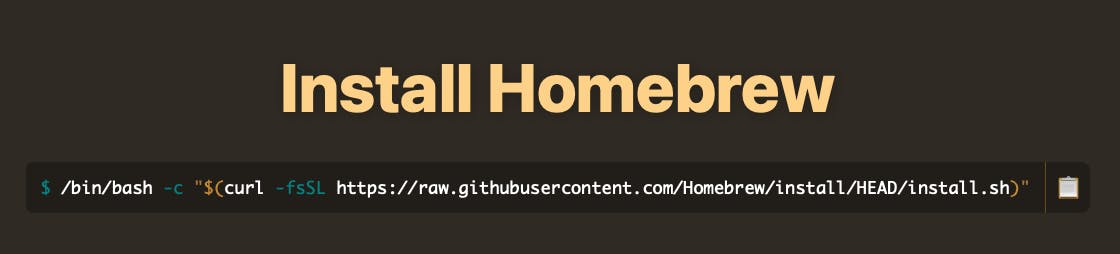
Before you start installing packages using Homebrew, you need to install the Homebrew itself first.
As the official documentation says, you can install using below command in your terminal.
Once Homebrew is installed, trying running brew --version command in your terminal. You should be able to see the installed Homebrew version. This also confirms that Homebrew is installed correctly on your machine.
You should get output something like below.
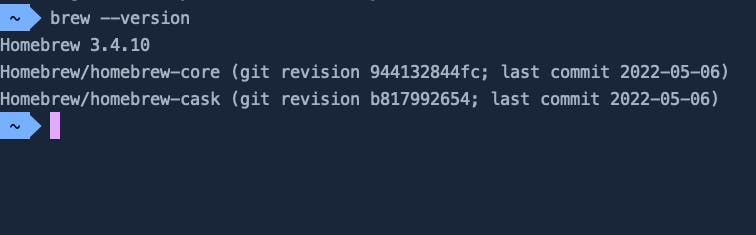
Homebrew 3.4.10 is the current stable version available to us at the time of writing this article.
Before we dive into installing packages using Homebrew, let's try to understand few important key terms around it.
Important terms related to Homebrew
Formulae: Homebrew maintains a definition file for its package, like a script file, which tells how to build and install the package for you on your mac. These are basically ruby scripts. This was developed for Hombrew as part of
Homebrew/homebrew-core project. Every package that you can install usingbrewcomes with its formula.Tap: Tap is a Git repository of Formulae. This repository gets cloned at the below location on your computer once you installed Homebrew:
/usr/local/Homebrew/Library/Taps/homebrew/homebrew-core.
Using brew tap you can add more repositories to the list of formulae that brew tracks, updates, and installs from.
Cask: It is an extension of Homebrew. It is used to install macOS native GUI applications. This was started independently, but later became part of the Homebrew project under
Homebrew/homebrew-caskproject.Cellar: This is the location where Homebrew installs the application. The default path is
/usr/local/Cellar.
Note: Paths that I have shown in this article are for Intel Macs.
Playing around with Homebrew
Once you have installed Homebrew, it clones a git repository in your machine where details about the packages and their formulae are stored. You update this repository using the command brew update. This will update your downloaded git repository, which is present at /usr/local/Homebrew/Library/Taps/homebrew/homebrew-core with the latest code. Now when you want to install something, or update something, Homebrew will refer to this repository and see what it can offer for you.
You update all the installed packages using the command brew upgrade.
Use this command to see the list of packages which are currently installed by Homebrew: brew list.
Next, let's say we want to install git on our Mac using Homebrew. There is a formula available for it, by name 'git'. You will install git using the command brew install <formula>. So, for installing git our command will be: brew install git.
Homebrew will install this at your Cellar. So for the git, it will get installed at the location /usr/local/Cellar/git/<version>/.
The binaries file for git will be present in /usr/local/Cellar/git/<version>/bin/git.
Homebrew will also add a symlink from /usr/local/bin/git to the binary file of git.
This is to help Homebrew keep track of what's installed by the Homebrew itself, and what all that have been installed by other ways.
One more important thing to note here is that when the package that you are trying to install has some transitive dependencies, then those dependencies also get installed along with the original package.
Let's try to understand installation of transitive packages by an example where I will be installing wget on my Mac.
I will go my terminal and issue the command brew install wget.
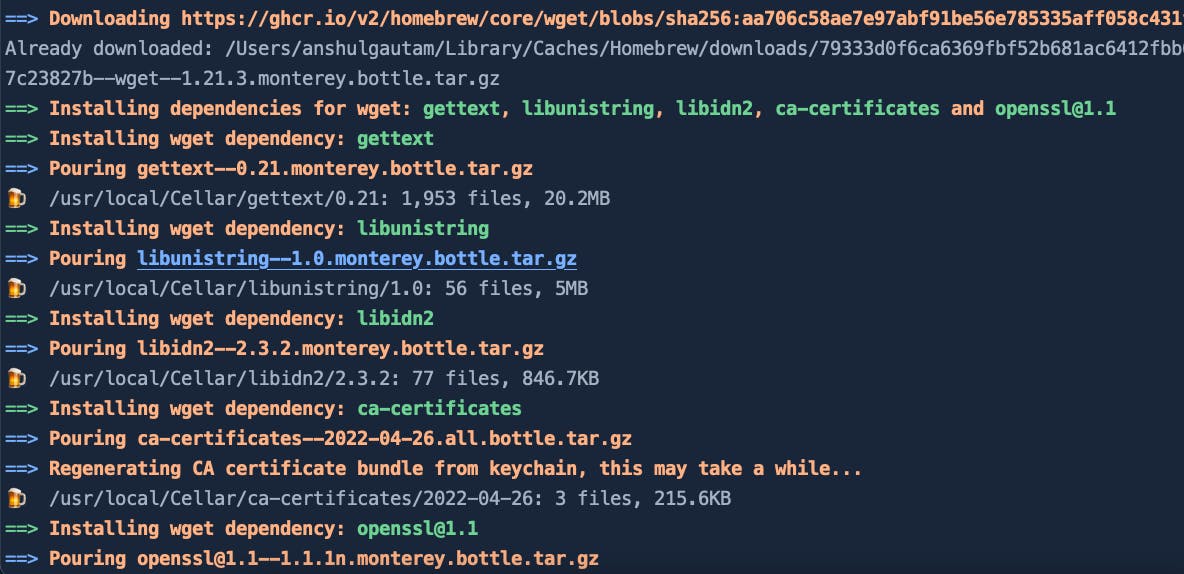 In the terminal you will be able to see list of transitive dependencies in wget, which Homebrew will also install for us. These transitive dependencies are needed by wget to run and that is why these dependencies are getting installed as well.
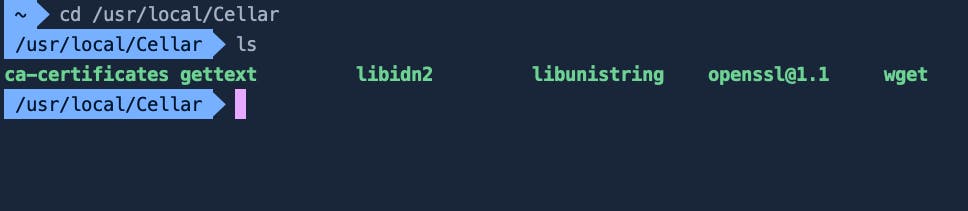
Once wget installation is complete, let's go ahead and check what all packages do we have now. We will be checking this by issuing the command brew list. Keep in mind that I had deleted all the previous packages, and my Cellar was empty.
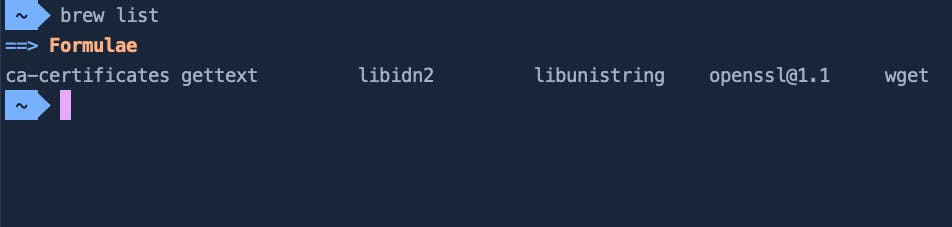
Okay, so along with wget we also have ca-certificates, gettext, libidn2, libunistring and openssl@1.1 now installed on our computer. Great!
Installing a GUI Application using Homebrew
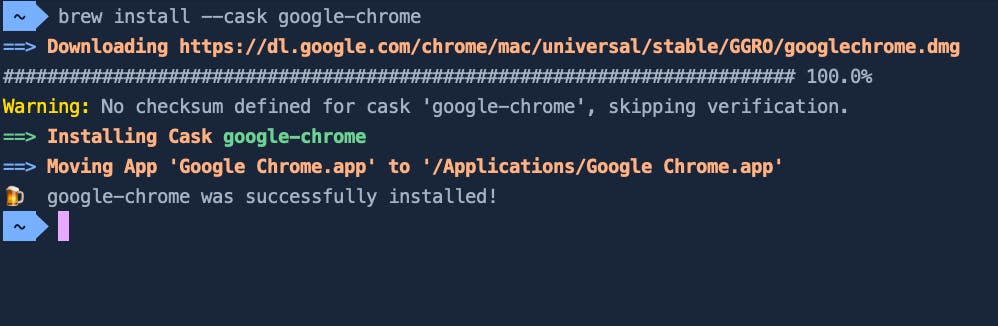
Like I mentioned before, we use cask extension in Homebrew to install GUI application. We will issue the command brew install --cask google-chrome to install chrome on our system.
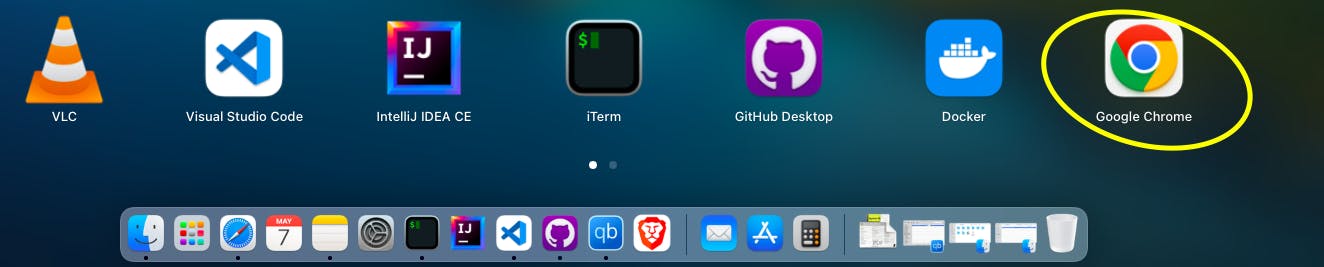
See it has installed the application and also added it in /Applications/ folder. This will be available in our Launchpad as well.
This application being a GUI desktop application, this was not added to Cellar.
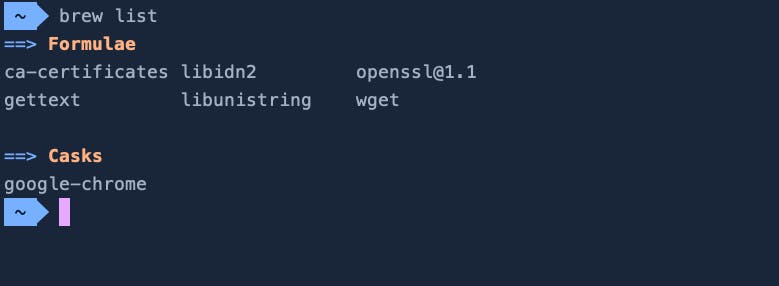
Doing brew list will show all the packages, and how they were installed. Notice it shows cask for the Google Chrome, as we installed it using cask.
Ending Notes
I hope this post gave you an idea on Homebrew, and how you can use that to install and manage packages on your Mac. I will reiterate here again that all the path values that I shared in this article are for Intel powered Mac computers. For Apple M1, these path values might vary.